

Apparently it's a dried plum. I've never seen it in its natural state. For all I know, it could be the by-product of slipper production deep in mainland China. Or dried lava from the ever-erupting Kilauea volcano. What you'll likely find if you venture into the dark heart of your local Asian market is a bright orange powder that's popular in Hawaii as a coating for dried fruits or candy. A quick Google search uncovers a shortbread, cakes, and li hing as accent on a cocktail. I think it's tremendous stuff. Sweet and sour and savory and really, really good on gummi bears.
But rarely is li hing found in an entree dish of any kind. Perhaps chefs of the world think the sweet-salty tang is too strong for proteins. Aloha Airlines offered a tomato-cucumber salad with ling hing mui vinaigrette from Alan Wong. And then they filed for Chapter 11 bankruptcy and no longer operate passenger service. Coincidence? Hey Alan Wong, the next time an airline asks for a Hawaiian dish for in-flight service, man up and pair li hing with the main course.
In fact, you can take my recipe if you like! I'd tried previously to integrate li hing into a cream sauce. Um... yeah... this isn't that recipe. This one I'm actually kinda proud of.
pan-roasted chicken with li hing mango salsa
Ingredients -- 2 servings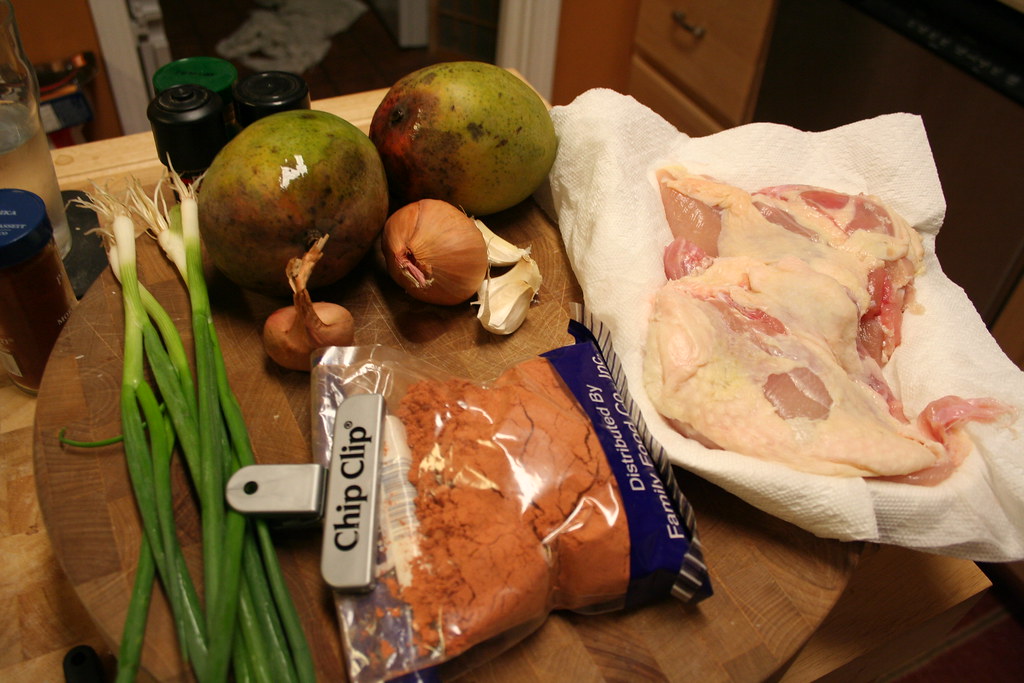
2 ripe mangos, cubed
2 scallions, chopped
2 shallots, minced
1 garlic clove, minced
5 garlic cloves, smashed
1 tbs. li hing powder
1 tspn. cumin
1 tspn. paprika
salt and pepper
1-2 tbs. olive oil
2 cups rice (optional if you are not Asian)
Equipment
12-inch oven-proof skillet
mixing bowl
Fire up the rice cooker. Preheat oven to 400-degrees. Heat the skillet on medium-low heat with the olive oil.
Season the chicken breasts with the cumin, paprika, salt, and pepper. Place them skin-side down in the pan. It should give a slow sizzle (if not, turn the heat down). The next step after this is the most important: don't f-ing touch the chicken breasts again until we're done. If you value crispy, browned, savory, delicate, heavenly chicken skin, then we're pretty much done here -- just let the heat do its thing. Brown the skin on the stove 4-5 minutes (okay, fine you can peek, but real quick), then transfer to the oven. Pop the smashed garlic cloves into the pan. Roast for about 30-35 minutes.
While you're doing absolutely everything you can to not disturb the chicken, cube/chop/mince the mangos/scallions/shallots/garlic and combine in a bowl. Add the li hing powder and mix. You might want to add the li hing a little at a time and taste it, because a little goes a long way.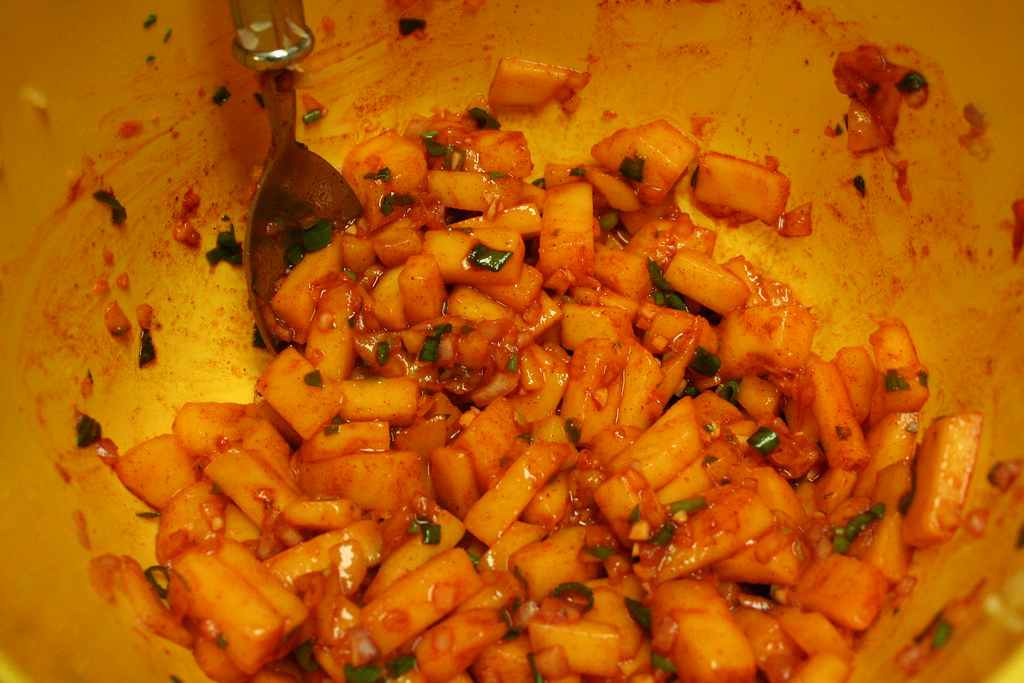
Maybe I'll be daring enough to actually put the li hing on the chicken directly next time. But until then... huzzah li hing!
15 April 2008
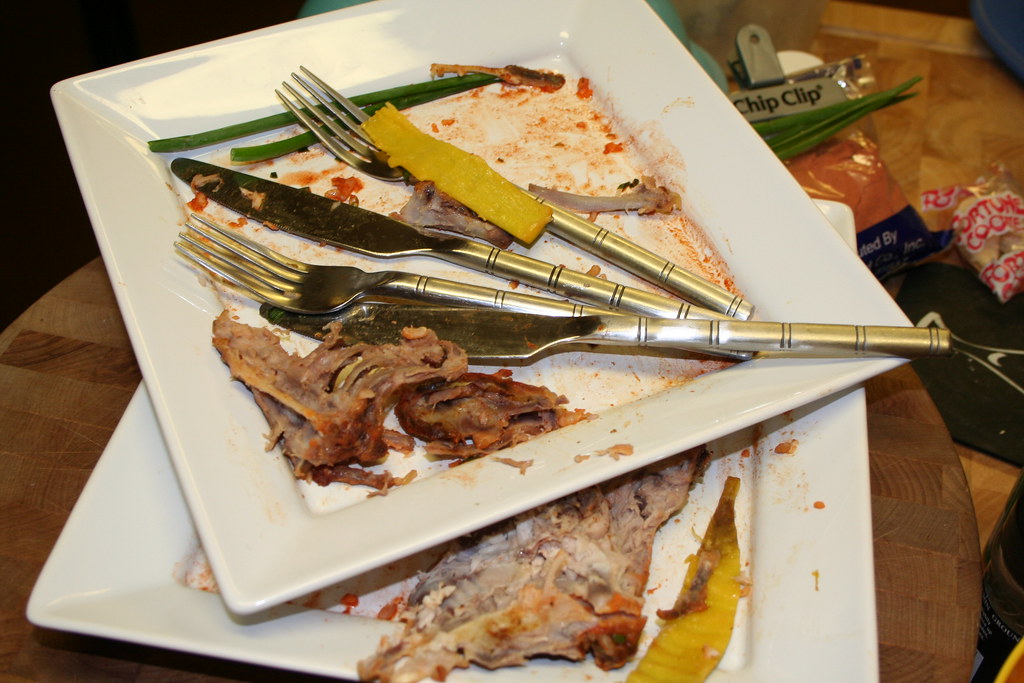
pan-roasted chicken with li hing mango salsa

06 March 2008
PB&J Trio

I've always thought the comforting mush that is soft white bread, mashed peanuts, and jam could be dolled up into a pseudo-gourmet novelty. So, after my cheap, lazy ass got through two-thirds of the day with PB&J, I figured I'd go for the trifecta at dinner. And do it Iron Chef style.
PB&J Trio
Ingredients
four slices white bread
peanut butter
strawberry jam
grape jelly
guava jelly
sliced bananas (optional)
Equipment
sandwich maker or panini press
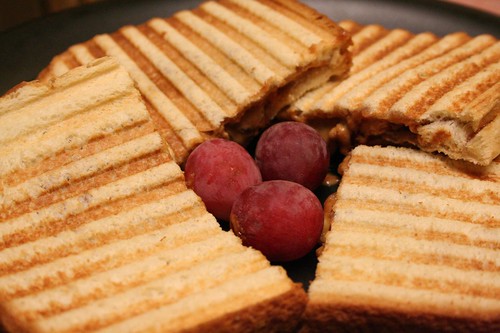
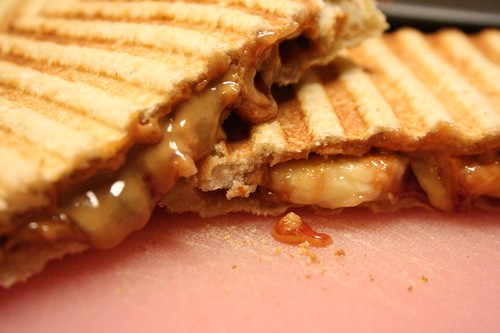
Plug in your machine and preheat. Slather two slices with peanut butter. Slather one slice with your preferred jam. Split the other slice between the remaining two flavors. If you're using a sandwich maker, be judicious with the fillings as they will become a superheated mash that will explode over your face. A panini press does a better job of melding everything together, so if you've got one (and you should), then go crazy.
I only used banana slices on half the sandwichs, so it's actually a PB&J Triple Trio. One thing I wanted to accomplish was eat grape PB&J and strawberry PB&J side-by-side and settle that argument once and for all. Of course, I grew up on the strawberry version, so I'm biased. But in my mind and in my mouth, the grape flavor is too distinct and doesn't meld well enough with the peanut butter. In grape's defense, the fact that it was jelly and not jam makes a huge difference. Jellies are generally too sweet and runny.
Interestingly, the bananas really dominated the strawberry jam and guava jelly. The guava was especially eye-opening. I brought the Hawaiian Sun guava jelly back from (drum roll...) Hawaii on my last trip, only to find it was exceptionally sweet. However, against the peanut butter and paired with the banana, the guava flavor almost disappeared and actually served to brighten the banana flavor.
The banana-strawberry was a little underwhelming. The two fruits always go together so well, and here I thought the starch of the banana would balance well with the sweet jam and creamy peanut butter, but the banana flavor tended to dominate. Also, the heat and pressure of being pressed softens the banana texture, effectively turning it into another jam and undermining my scientific hypothesis for including them to give the sandwich some bite. Thankfully, this science experiment still tastes good and remains cheap and comforting. The master stroke of this preparation is the crispy texture of the bread, which turns an old school comfort food into a warm, crunchy-gooey culinary pleasure. That's how I'd describe it if I were on Iron Chef, anyway.
20 February 2008
Surfas Restaurant Supply & Valentine's Day
It seems there's a frozen food for every level of foodie. Convenience stores have those wonderfully cheap Tina's frozen burritos. Supermarkets take it up a notch, with everything from Michelina's (my college preference) to Lean Cuisine and Smart Ones (Camille's work food of choice) to those frozen pasta bags that actually resemble real food after some time in a frying pan. Trader Joe and trader pals Jose, Ming, and Giotto have stuff that you could seriously fool people into thinking was more expensive.
And then there's Surfas Restaurant Supply in Culver City, which is more expensive and could seriously fool people into thinking you're some kind of chef. In fact, when I went to buy my Valentine's Day dinner ingredients, the kindly clerk asked, "Are you a chef?" Apparently, duck confit, dried figs, juniper berries, and foie gras are not the normal purchases of, say, aspiring screenwriting foodies who blog in their spare time.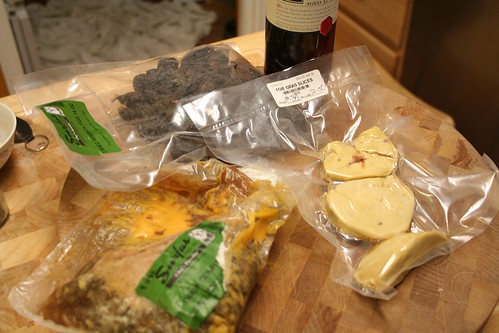
Anyway, I'd planned on only buying foie gras, but being in Surfas is being the proverbial kid in the candy store. The fridge and freezer section alone contained numerous items of culinary holiness like creme fraiche, duck fat, rillettes, and, yes, frozen duck confit. Confit is another dish I've wanted to try, except it's one of those things that requires a lot of lead time, what with the curing in salt for days. Now, in the time it took me to grab the frozen duck and foie gras out of cold storage, I had pretty much finished my main dish. And get mistaken for a chef, no less!
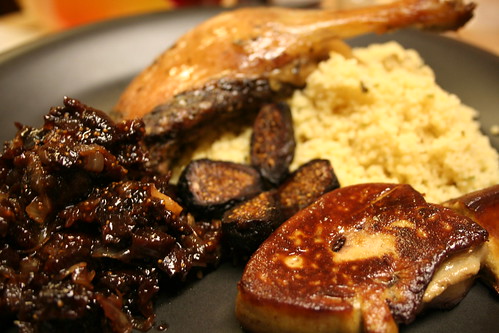
Duck confit, seared foie gras, fig and port charoset, pine nut cous cous.
The thing that puts seared foie gras over the top is the texture. Yes, it's creamy and rich, but searing it properly gives it a crust and a lovely bite. It crunches slightly, then melts in your mouth. All geese should have the good fortune of exiting the world in this fashion.
According the the Epicurious recipe I got, the fig and port charoset is apparently a staple of Jewish seder. I don't know anything about that, but it ends up being a sweet, sticky fig chutney mush which works really well as a side dish. Plus, you'll have an open bottle of port begging you to finish it off while you're cooking, which is just fine and dandy.
The first two ingredients are cheats. Of course, cous cous is insanely easy, so it's not much of a shortcut to buy the prepackaged box. As for the confit, there's that curing in salt business. Yeah, no...
Ingredients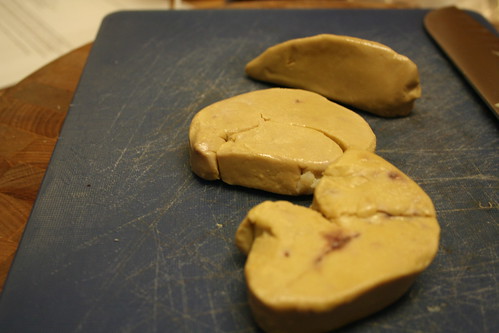
1 package pine nut cous cous
1/3 lb. foie gras (about two 1" slices)
1/2 cub dried figs, chopped
1 medium onion, chopped
1 cup port wine
3 tbs. vegetable oil
1 tbs. butter
Equipment
oven
2 small pots (seriously, who calls small pots "saucepans?")
1 frying pan
Preheat oven to 375.
Place duck confit into the oven and bake 20-25 minutes. Good job, chef.
Combine port and figs in small pot #1, bring to a boil, then reduce to a simmer for 15 minutes. Meanwhile, heat the oil over medium-high heat, add the onions, and cook, stirring often, until the onions lightly caramelize, about 15-20 minutes.
Place the onions in a bowl and let cool slightly, add the port and figs, and mix. Add pepper to taste. Set aside.
Cook the cous cous. It should take about 6 minutes tops.
Turn the oven off, flip on your broiler, and move the duck confit to the top rack just underneath. Broil for 1-2 minutes until the skin is crisp. Remove and let rest.
Wipe down the frying pan (or use a fresh one) and melt the butter over high heat until the bubbles subside. Lay in the foie gras slices and sear for about a minute. Flip and repeat. In order to quasi-sear the sides, tilt the pan so the butter pools in one end, then use your spatula to splash the hot butter over the foie gras. Remove to a paper towel to drain.
Plate and serve.
06 February 2008
Kare Kare
Get a slow cooker.
If I've learned one thing over the short life of this blog that I can impart, it's that. Get a slow cooker. It's like cooking but... not. For some reason, I used to associate slow cookers with gimmick culinary contraptions like salad shooters, knuckle guards, or the Ronco Food Dehydrator (it makes turkey jerkey!). In fact, it probably does less than all those Magic Bullet-type devices. The only thing it does is slowly but surely heat whatever you put inside it.
But, oh, the magic it did for my latest batch of kare kare. My recent foray into Filipino cooking was inspired by my recent Christmas trip home to the Bay Area. It was the first time I'd ever spent Christmas day without my parents, who flew south for the winter. So, when I wasn't officially upgrading Camille from girlfriend to fiance or playing Guitar Hero, I was watching Camille's mother cook. Because she's the working mother of four kids, she has an amazing shorthand for pinoy dishes that are notoriously laborious. And using only two burners and a turbo cooker, to boot.
I'd previously tried kare kare, the peanut-based oxtail stew, once before using a recipe from Memories of Philippine Kitchens, which has more traditional leanings in terms of flavor and preparation. The recipe calls for an initial stewing to soften the meat and make a broth, cooling overnight to separate the fat for use the next day while cooking an assortment of veggies. It also uses equal portions of peanuts and peanut butter while more contemporary recipes pour on the peanut butter for a richer flavor and texture.
Camille's mom? She cuts onions and minces garlic, tossing them into a hot pot as she goes, then sears off the oxtail, boils it down, dumps a combination of sauce and flavor packets, then the peanut butter, then bok choy and longbeans. Hour and one-half, two hours tops. She has kids, she says.
And it works. It's really good. Sweet and savory, beefy, peanut buttery goodness. The gooey thickness of the peanut butter sauce with balance from the mildly sweet, leafy bok choy and the bite of the green beans. Except the oxtail meat is just a tad too firm. I wanted to do a hybrid of the two methods, but unfortunately there's really no short cut for breaking down beef into a tender, juicy wonder.
Enter the slow cooker.
Ingredients
2 lbs. oxtail, cut into 2-inch pieces
5-6 cloves of garlic, peeled and mashed
2 medium onions, chopped
1 1/2 - 2 cups peanut butter
2 handfuls (about 1 lbs.) longbeans, trimmed and halved
4-5 heads baby bok choy, rinsed
3 tbs. oil
2 eggplants, halved and chopped into 3/4" pieces (optional)
steamed rice
Equipment
slow cooker
large, heavy pot
(I bought a Le Creuset dutch oven a few years back that's big and heavy and beautiful. There are probably cheaper dutch ovens that are reasonably comparable performance-wise, but they ain't as good and they're definitely not as beautiful, and no one brags about their reasonably comparable and ugly dutch oven. My point: go cheap everywhere else, but indulge yourself with at least one Le Creuset.)
My cousin recommended slow cooking overnight, which I did by simply placing the oxtail in, filling the crock pot with water, covering, and setting to low. No need for refrigeration or fat-skimming or any of that. In the morning, the meat was still a touch on the firm side. So, I just left the thing on and went to work.
When I returned home, the oxtail had been slow cooking for about 18 hours, resulting in suitably beefy broth and meat that was fall-off-the-bone tender. Not a figure of speech, it was falling clean off the bone. The fat and cartilage melted away and the meat fiber sloughed off when I tried fishing it out of the crock pot, leaving white, clean bones that looked like a cross between a biplane and an X-Wing fighter. Cool. Set aside the oxtail, heat the oil, and saute the onions and garlic about five minutes. Add the peanut butter and the broth. I used about eight cups of broth, but if it's not enough you can add more later. Let simmer until the peanut butter has incorporated well, then add the oxtail and eggplant. Continue to simmer for about 10 minutes.
Add the longbeans and bok choy and simmer another 10 minutes for the flavors to combine. Taste and adjust the texture to your liking by adding either more broth or more peanut butter.
Portion rice into bowls, then ladle the kare kare into it. Now, all you need is a spoon. Though Camille and I have been on a brown rice kick lately, I found that the dryer, nuttier brown rice wasn't able to soak up the stew as well as white rice.
01 February 2008
Lechon (or, How to Commit Suicide by Deep Frying)
Lechon Kawali
One of the most iconic traditional pinoy dishes is lechon, the spit-roasted pig. Sadly, I have neither a whole pig, large skewer, nor a large fire, not to mention the wherewithal to clean, season, and skewer a whole pig. Which is why I opted for lechon kawali, the indoor version that involves boiling, drying, and deep-frying pork belly. It's a celebration of fat. Making it helps you realize it's basically a bacon slab deliberately cooked in such a way so the thick layer of fat under the skin doesn't melt away. You want that fat. You need that fat. It's good eating, that fat. Looking at lechon kawali is looking at a chunk of boiled, deep-fried fat that's been seasoned with a touch of meat.
This is atypical Filipino family party food, but my mom never made it at home. And now I know why. My soon-to-be mother-in-law taught me her simplified method that replaces frying with a turbo broiler, but since I don't have a one I had to mix and match various methods.
You will need...
3-4 lbs. pork belly, cut into strips
salt & pepper
cane vinegar (sukang maasim)
a large pot
a lot of piping hot oil for frying
acceptance of your own mortality
a splatter shield
a draining station (paper towels, or a slotted baking sheet set over paper towels, etc.)
Cut the pork belly into long strips, about 1 - 1 1/2" wide. Season with salt and pepper. Boil for about an hour, until the meat is tender and the layer of fat has swollen considerably. Remove the strips and let dry on paper towels for at least one hour.
The proper post-boiling step as taken from the terrific book Memories of Philippine Kitchens...
"3. While simmering the pork, preheat the oven to 400. Using tongs, transfer the pork to a roasting pan fitted with a wire rack, pat the pork dry with paper towels, and brush on both sides with vinegar. Transfer to the oven and roast for 20 to 30 minutes to dry, turning onces with tongs. Remove from oven and keep in a cool place to dry for another 4 hours."
Then fry the pieces about 6-7 minutes until the skin is crispy all the way through. Set aside to drain and cool.
Now, I'm making a point of referencing and quoting because that isn't what I did.
Following the boil, I gave the strips several pat downs, cut them into large chunks, and popped them into the freezer for about ten minutes while I heated the oil. Despite the vast majority of recipes I looked up -- you know, the recipes based on generations of experience -- recommending to dry the pork for a prolonged period, I went with the one recipe that said one hour of air drying would do the trick. Yeah, not so much.
Quick and dirty science lesson if you've never thought about why hot oil goes batshit crazy when water is introduced: water and oil do not mix (clearly I am a genius). When molecules of water are surrounded on all sides by hot oil, the water instantaneously boils. The resulting vapor then goes racing up towards the surface and looks around to see there's a microwave and a floor and my face within reach, and explodes like so much nitroglycerin.
Of course, I knew this and figured all the drying was for this exact reason. But, damnit, I wanted lechon kawali NOW!
Well, it seems pig fat does a reasonable job of holding a lot of water. I'm going to estimate that the top of my microwave is about three and a half feet above the stove. Scorching vegetable oil exploding through a splatter shield and above the microwave might possibly be the scariest thing I've witnessed in person.
Anyway, be sure to fry the pieces until they are crispy and don't give under a little pressure from tongs. Lechon sauce would be nice (like Mang Tomas "All Purpose Sauce"), but Camille simply likes to drizzle some vinegar over it. The crispy, rich fat and the lean meat, combined with the acid saltiness of the vinegar makes for some addicting, life-affirming food.
 Paksiw Na Lechon
And it doesn't stop. No, the real beauty of lechon is the leftovers can be cooked into a completely different dish. Most Filipino restaurants are casual turo turo joints, which means "point point." But when I'm in line with my tray, staring down at my choices, I'm always looking for one thing: paksiw na lechon. (As for the Filipino trend of doubling up on words... don't don't ask.)
Using vinegar, soy sauce, brown sugar, and a whole lot of "All Purpose Sauce" to stew the meat and reverse all that drying and deep frying, paksiw na lechon is more hearty and savory. It's absolutely required to have rice on the side to soak up the juices (not that any Filipino would be caught dead eating this without a side of rice). Unlike lechon kawali, the meat takes center stage. The pork flavor really comes to the fore with the sweet and tangy stew, the richness of the fat working more as a balancing counterpoint.
I used a recipe from pinoycook.net which basically calls for letting the meat break down in the stew, then adding All Purpose Sauce (which, by the way, is used for all purposes lechon, but nothing else) to smooth things out. In restaurants, it's usually fairly thick, but this preparation is runnier, more in line with most stews. Salty, sweet, savory. I love this stuff.
17 January 2008
Bulalo
That's bu-la-LO. Don't worry, the first time I read it, I mispronounced it, too.
I really enjoy the notion that food is true living history, even though 99% of the time it's, you know, dead. The term "comfort food" doesn't quite capture what happens when a dish not only works on your senses and sentiments, but connects you to a culture. Especially when said culture is "your" culture. Nostalgia from childhood is one thing. Realizing that thousands of people for centuries have eaten what you're eating is oddly transcendent.
I'm a first generation Filipino-American. I don't speak Tagalog. I despise pinoy movies. Some of the food even scares me. At least, it used to. My mom didn't make too many Filipino dishes while I was growing up, but one staple she always fell back on is bulalo. I did reference a recipe when I made it recently, but I mainly went along with my mom's beautifully simple directions. Beef shank. Bones. Water. Cook it.
It's about two parts water to one part beef material, then reduce it down and taste as you go. Whole peppercorns and sliced onions add a nice layer of flavor, but really all you're making is beef broth that's savory and rich from the bone marrow and melted fat. While it's probably a good idea to skim some of the fat, that's precisely what makes bulalo into lip-smackingly good stuff. Toss in some cabbage and potatoes to go along with the tender, stewed beef, and then ladle the stuff over rice, and you've got a cheap meal fit for fine, upstanding immigrants. Suddenly, I was ten again. I specifically remember my dad spooning and eventually sucking the marrow out of the bone. This always freaked me out to no end, but now I know better. The bone marrow is by far the best part of the dish. It's where the flavor in the broth comes from. Camille and I tried foie gras recently, the fattened goose liver that's always prevalent in the menus on Top Chef. It's creamy and rich, well deserving of it's reputation.
Stewed beef marrow is kinda like that. Concentrated, decadent, fatty beef flavor. Not quite as creamy, but just as guilt-inducingly good. I don't know what kind of fat and cholesterol takes to my veins after eating this dish. I don't want to know. All I wanted to think about after scraping the last vestiges of marrow from the bone was more efficient ways to get it out from inside the hollow. If you handed me a stewed bone and a wide straw, I'd totally go for it.
09 January 2008
Bacon Days, Part 2: Bacon-Wrapped Scallops
 Oddly, I can't think of a restaurant where I've had bacon-wrapped scallops, or even a cooking shown where I've seen it prepared. I certainly didn't invent them, but somehow it's entered my bag of tricks. Maybe because it looks fancy and makes a good impression. Though it's a little time-consuming because of the bacon, it's pretty straightforward.
I use the frozen scallops from Costco, which are actually pretty large. Each one's about two or three bites, so while I think of it as an appetizer, three or four of these bad boys on a plate with some greens and some vegetables would make a solid meal, too. The light sweetness of the scallops and the savory, rich, crispy bacon are a natural fit. It's light and fatty surf and turf (kind of). And I'm telling you, it's a conversation starter.
16 scallops (1 bag from Costco), thawed. Fresh is nice, too.
16 slices of bacon. Most packs of bacon are not 16 slices, so you're screwed here. Buy two.
16 toothpicks. These also don't come in boxes of 16, so you're screwed again.
Obviously, you can make more or less, but you're pretty much guaranteed to have extra bacon or extra scallops and definitely extra toothpicks.
Be sure to remove the toothpicks you need before you touch anything raw, or else you'll end up with 484 toothpicks with raw bacon/scallop juice drying on them.
Cook the bacon first. You can do this in a frying pan, but I'd recommend cooking them in the oven. Especially if you have one of those oven grill pan deals that'll let the bacon fat drip down into a pan. A lot easier.
So, preheat your oven to 350 while you're getting everything else together, and then cook the bacon 4-5 minutes, about halfway. Don't cook them all the way as you want them pliable. They should turn from their raw, pale pink into a slightly-cooked, pale light brown. Set aside and let cool.
Heat a frying pan on high heat.
Once the bacon is cool enough to handle, tightly wrap one slice around each scallop, securing with a toothpick. Revel in their beauty.
Make sure the pan is hot, then cook in batches. Sear, cooking about 3-4 minutes on each side until browned. The scallops will shrink slightly and little gashes will open up. Cook until the juices stop running. Set aside to cool slightly. Season with salt and pepper if you want, but you don't need to.
If you're feeling saucy, lay down a bed of greens on a plate and place the scallops on top. Serve and revel in your guests' gushing remarks of your culinary prowess.
Orange-Cranberry Sauce (Eat it, Williams-Sonoma!)
I can't remember a Thanksgiving where someone in my family actually made cranberry sauce. We've had roasted turkey and deep fried turkey and turducken with all sorts of stuffing and sides, but never a homemade cranberry sauce. After a lifetime of this, I just assumed a homemade cranberry sauce was too difficult or simply never compared to the scientists at General Mills or whoever makes those store-brand cranberry-flavored jelly-type substances.
In recent years, Camille and I have resorted to a $10 jar of orange-cranberry relish from Williams-Sonoma. It's mighty good, but for our recent Christmas party I bought a package of fresh cranberries to make my own cranberry sauce.
Well, it didn't happen for the party, but I finally did it. We had turkey breast in the freezer (also left over from the party) so I finally took my crack at the elusive cranberry.
And boy, oh boy, it was exceptionally easy. So easy, I nailed it on the first pass. And it's good.
Seriously, this is the first attempt. Go ahead, jar it up and sell it for $10 a pop if you want.
3 tablespoons butter
2 small yellow onions, chopped
12 oz. (1 bag) of fresh cranberries
1 1/4 cups sugar
3 clementine oranges or 1 regular orange, roughly chopped.
salt, to taste
In a pan over medium-high heat, melt the butter. Add the onions and saute 4-5 minutes. Add the cranberries. Cook, stirring occasionally, until the cranberries begin to burst and break down into a sauce. Add the sugar and continue to cook for 2-3 minutes. Add the oranges and cook about another minute or until the sauce has thickened to your liking. Add salt, to taste.
See? I told you it was easy. This must be what it felt like to have "invented" bottled water.
24 October 2007
Capellini Shrimp
They say imitation is the sincerest form of flattery. Consider yourself flattered, C&O Cucina.
One of my favorite things to make at home is "inspired by" (or, in Hollywood-speak, "a homage to") the Capellini Shrimp dish at the Marina Del Rey ristorante. My take on it is a tad different, but still beautifully simple, sublime, sweet, and easy. I overload it with garlic because, seriously, is there such thing as too much garlic? However, the real kicker is the sun-dried tomatoes. DO NOT make it without sun-dried tomatoes. Shrimp is inherently light, almost bland. Sun-dried tomatoes give the dish the proper richness it needs to enhance all the other light flavors.
I think I almost made this in thirty minutes once. Eat it, Rachael Ray!
The software... ~1 package (16 oz.) capellini
~2/3-ish lb. shrimp, roughly chopped
~5-10 garlic cloves, minced (I don't give myself points for subtlety, so I use 10+)
~a handful (hell, I dunno, 3/4 cup?) of sun-dried tomatoes, chopped
~one package (hell, I dunno, 1 1/2 cups?) grape or cherry tomatoes
~olive oil
~grated parmesan or romano cheese
The hardware...
~one large frying pan
~one pot 'o boiling water
The program...
I should mention that I use the sun-dried tomatoes that are stored in a jar with olive oil and herbs. I guess you could use the truly dried ones that need re-hydrating, but for me "re-hydrating" is the exclusive domain of astronauts and marathon runners. Okay, so, get some salted water into the pot and throw it on high heat. I use frozen shrimp (this dish is always on-call in my home), so now's a good time to throw those in a bowl of water to defrost. Chop up all that needs chopping, which is everything. I usually have medium-sized shrimp that I chop into thirds. This way, you can evenly disperse the shrimp throughout the plate and, hopefully, have some shrimp with every bite.
Heat the frying pan and olive oil. I usually cover the majority of the pan with olive oil. I know that sounds like a lot. You could make a white wine butter sauce like C&O does, if you know how. Or you could use a buttload of olive oil. I bet you the buttload of olive oil is healthier. And olive oil tastes good, anyway. So, get the olive oil up to temperature. Unless you're a meth addict or an Iron Chef, the water should be boiling by now. Capellini cooks fast compared to other pasta. Time it so you finish cooking everything else at the same time as the pasta, like so: Drop the minced garlic into the olive oil and let it cook for about thirty seconds, then get the chopped sun-dried tomatoes in. The olive oil should soak up all those lovely flavors, and you'll definitely be smelling it. Please resist the urge to lap up that piping hot oil.
Throw the shrimp on there and cook, killing the heat as the shrimp gets close to opaque. Shrimp also cooks fast and gets rubbery when overcooked. Keep in mind that it'll sit in the piping hot oil until you dump in into the pot of steaming hot pasta, so don't worry about serving a lukewarm salmonella factory. It'll cook through.
Reserve a cup or so of the starchy pasta water before draining, so you can add as necessary later if the pasta gets too dry. After draining, return the capellini and then dump the whole works from the pan into the pot. Mix it as best you can (I find this to be the hardest part, actually) and then plate what you need. Now add the fresh tomatoes. I drop a healthy handful onto each plate, so you get the light, juicy sweetness of the fresh tomatoes against the richer flavor of the sun-dried ones. Sprinkle the cheese, as parmesan and/or romano cheese will add a nice undertone of saltiness. And there it is. If you're feeling saucy, you can chiffonade some basil for garnish (also known as the "rolling a joint and chopping it" technique). But really, it's pretty enough, so have at it. Enjoy the tomatoes and get ready to breathe garlic for about an hour.
03 October 2007
Pseudo-Memories of France
Ah, comfort food. I love a dish that's warm, hearty, savory, and brings back fond memories of my childhood in provincial France playing marbles, cycling, and thumbing my nose at those dimwit American tourists.
By France I am actually referring to quaint little San Lorenzo, California and quaint, ridiculously suburbanized Castro Valley, California (East Bay!) where I never so much as sniffed a French bistro. Probably a good thing as San Lorenzo and Castro Valley are not exactly culinary havens. I did trek to Paris (among other European stops) after graduating college, though. Here's a tip if you're backpacking through Europe on the cheap: Don't go to the Moulin Rouge. I know, I know... I, too, loved Baz Luhrmann's filmic ode to bohemian love, and I, too, have a silly man-crush on Ewan McGregor. Just keep in mind that Montmartre is on the outskirts of Paris, so when you finally get to the Moulin Rouge and realize it costs at least $200 for dinner and the show, you'll smack yourself in the head, decide to pass, and look around and see that there's merde to do in the immediate vicinity. My buddy and I visited the various souvenir shops and settled in at a restaurant across the street that, judging by the English menu, catered to tourists. It was here I had my first croque monsieur, the egg-less sibling of the croque madame. I've tried to replicate it in the past without making bechamel sauce, one of those French "mother" sauces that scare the bejeezus out of a novice cook like me, and boy is that a mistake. Without bechamel sauce, the croque monsieur/madame is just a dry sandwich. So, grab your whisk, it's sauce making time. Your wrist will hurt, but you'll feel like a chef afterwards.
Before you start the sauce, though, start your broiler and place your oven rack right up under it. Huzzah for pretty blue flames! I used a bechamel recipe from Williams-Sonoma. You're basically going to make a roux (French word alert! It's the thickening agent behind every sauce and gravy made from butter and flour. And it's pronounced "rue.") and then whisk in milk and cheese. The recipe calls for gruyere cheese, which is some salty good stuff. If you're wondering if you have to continuously whisk the entire time... yes, absolutely. Do NOT stop whisking! I stopped for ten seconds to peruse the recipe and the sauce burned slightly. Since I'm a lazy mofo, I pushed on with the lightly toasted bechamel. It's still good, it's still good.
If you're saying to yourself, "Butter! Milk! Cheese! How healthy is this?!"  The answer to your question is: You clearly don't love food. Go eat a carrot.
After making the bechamel sauce, the hard work is done. All that's left is to do the math, as we used to say in Calculus (not bragging, I barely passed). Assemble your dish.
Don't buy sliced bread for this. You're not eating it with your hands, so get a nice, fresh bread that'll sop up the sauce but still hold together. In other words, slice it thick. I bought some organic deal from Whole Foods, not because it was organic so much as it was round. Thems round loafs is fancy! It smelled good and was slightly soft. It ended up being some kind of sourdough, which wasn't in the recipe but works splendidly.
I used a croque madame recipe from, yes, Williams-Sonoma, but it called for black forest ham, which I didn't have. I did have a bunch of leftover rotisserie chicken from Costco... perfecto! (Perfecto is not a French word.) Toast the bread first, then pile on chunks of chicken and ladle the bechamel over the whole thing. Top with more grated cheese. Throw it back in the broiler until the cheese begins to melt and brown. At this point, you've pretty much got a croque monsieur that's waiting to be madame-ed. Get a pan with oil going and fry an egg. You probably think you can fry an egg. I used to think so, too. But I never did it the same way twice. Then I realized that once the egg is down in the pan and frying... leave it the hell alone. Let it cook. Don't flip it yet. Just don't do it. Leave it be until the whites are all, you know, actually white. Not partially white. White. If you want over-easy, flip it once. It's not a steak, there's no reason to flip and flip and flip. Cook it through on one side, flip once, cook it to your desired doneness on the other. Camille doesn't like runny yolks, so I let hers go a little longer before flipping to make sure the bottom of the yolk is cooked.
Okay, so the broiler has probably done it's business by now. Take out the sandwich, plate it, top it with an egg. That's it. The recipe calls for topping each piece with another slice of bread to make a sandwich, but the tourist trap eatery across from the Moulin Rouge made it open-faced, and since I'm sentimental, I did the same. The bechamel turns what is otherwise a mundane, dry meat and cheese combination into a rich, creamy, hearty, comforting dish. Savory chicken, tangy bread, cheese... that stuff hits the spot. Even better, as hearty as it is, it doesn't weigh you down. It brings back fond memories of France that I don't really have (damn you, Moulin Rouge! Damn you to hell!). Mmmmm, sentimental sandwich.
29 August 2007
Ginger-Crusted Scallops, Take 1
It's hard to choose a favorite culinary experience from my recent Hawaii trip. There's just too much goodness there, and all of it comes with a side of rice, so bonus points for that. But if you were to hold a gun to my head and make me choose, I'd have to go with the Ginger-Crusted Onaga I had at Alan Wong's. I don't think I've ever had a better cooked piece of fish: flaky, juicy, tender, and with the ginger crust and miso sauce base that complemented but didn't overpower the meat.
Now I'm back on the mainland, wearing socks and shoes again and seriously jonesing for some good lau lau. The idea of getting fish that good here is almost laughable. I mean, the Costco's in Hawaii had the freshest albacore and ahi tuna I've ever laid eyes upon... the Costco's! My local Ralph's rarely has decent tilapia. What's a poor haole to do?
Whole Foods is a good start. During a recent stroll through my temple of organic goodness, while drooling over the sea bass and grouper selection, inspiration suddenly hit me (as it's prone to do when staring at fish priced at $18/lb or more). Why not try to mimic the ginger crust, but do it on something I'm a little more confident cooking... scallops.
Thank Google there's a recipe online for Alan Wong's masterful dish, so I used that as my basis. I had some mini bell peppers from my local Costco in the fridge (they only have farm-raised salmon in Canoga Park. Pssssh...), so I decided to go for Ginger-crusted seared scallops and broiled mini bell peppers on a miso reduction.
The crust recipe calls for minced ginger and scallions, but I didn't have scallions at home, so I substituted it with sesame seeds. Per the recipe, I heated 1/4 cup oil until smoking and poured it over the crust mix. It boils over like lava -- very cool -- and cools off to the side.
I started to chop the mini bell peppers, but as they were barely a few inches in length, I just tossed them whole onto an oven pan, drizzled with sesame oil and sea salt, and broiled on high until it just starts to char, them removed. I dusted with a little dashi soup powder for more seasoning. Done.
With oven pre-heated to 350-degrees and a hot pan with smoking sesame oil inside, I seared the scallops for about 30-45 seconds on each side, then topped with the ginger/sesame crust, and threw them into the oven for about six minutes to get them medium-rare. Meanwhile, I had a couple teaspoons of miso paste in about a cup or so of water that was reducing down to a thick paste.
Plating. I dropped a circle of the miso reduction on the center of a plate, arranged four scallops per plate on top, then fanned out the mini bell peppers around the scallops. If I had scallions I'd use them to garnish, but then again, if I had scallions, they'd be in the ginger crust. The results? The cooking time for the scallops is perfect for medium rare, though the baking causes juices to run and muck up the lovely sear that was created. They were juicy with the muscle strands just starting to show. Sadly, the ginger wasn't minced fine enough, and it really overpowers the sesame seeds. Maybe next time, the sesame seeds should be toasted and used as a garnish. The peppers were almost perfect. They basically cook in their own juices, and biting into them causes a burst of sweet flavor to drizzle down all over yourself. Okay, not the cleanest thing, but damn tasty. I didn't put enough dashi powder, but so what, these were a success. Next time, I might nix the ginger crust altogether and drizzle the miso reduction over the scallops, instead.
I'd give myself a solid B for my efforts.


